Before we jump into configuring DNS tunnels, What is DNS tunneling? When and Why do we need it?
In most of the modern networks it is very less likely that DNS traffic is ever going to to be blocked by the firewalls.
DNS traffic could be filtered to only specific domains or only high reputed domains in few cases.
Most of the times DNS requests to all the domains are allowed by firewalls
There could be multiple possible cases where DNS tunneling proves to be useful.
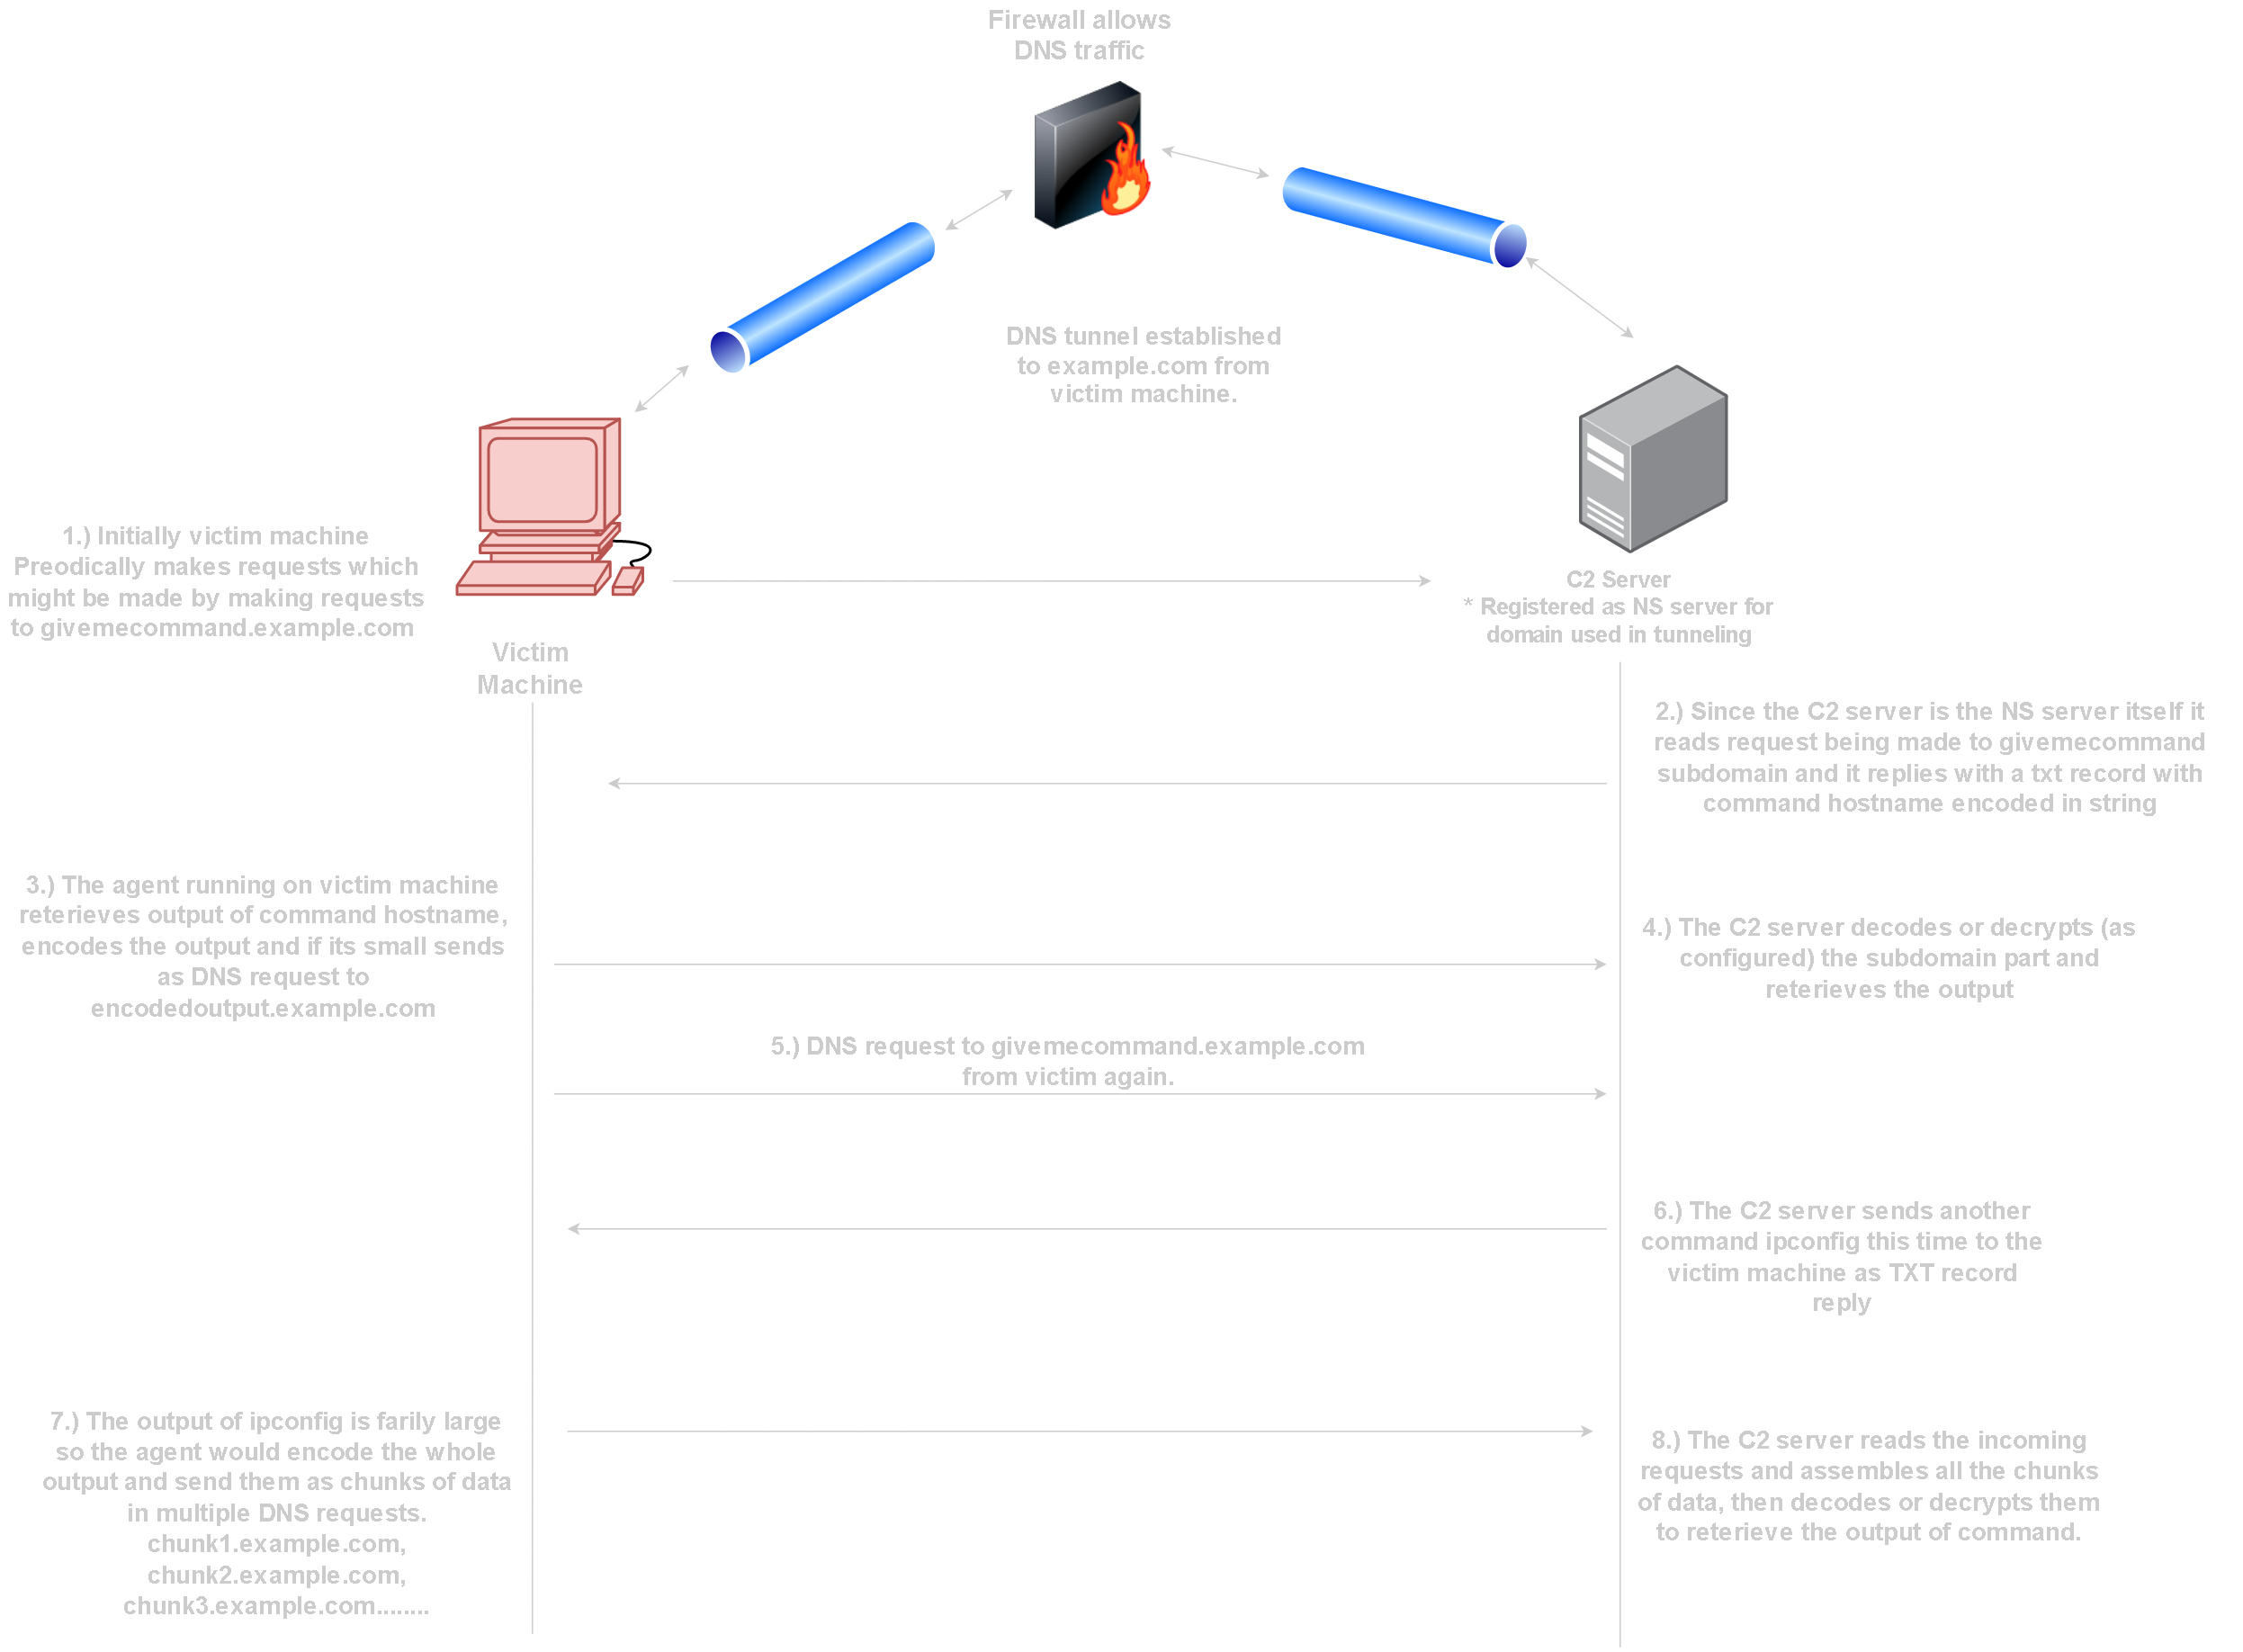
A very common example is a Command and Control Server using DNS tunnel as a communication channel.
In DNS tunneling the normal network traffic or packets are encapsulated as DNS traffic.
These packets are then exfiltrated using DNS queries. This could be done in a number of ways using DNS.
In this article We will not dive deep into how that works.
Example: How would a typical DNS tunnel work as a C2 channel?
There are multiple open source tools that can be used to do DNS tunneling.
Most of these tools focus on creating DNS tunnels to access internet via DNS,
which can prove to be useful in bypassing captive portals
We are going to focus on using DNS tunnels to access internet. This can be useful to bypass captive portals.
which very often require users to authenticate to access internet.
Most captive portals will by default allow users to make DNS requests without being authenticated to the portal.
we are going to use a very well known tool iodine for creating DNS tunnels.
Iodine comes with both client and server.
The server can be invoked using the command iodined and the client with the command iodine
Before we proceed further you need to have a machine with public IP on the internet (For Iodine Server).
You might host a VM on Azure or AWS
Make sure that there are no firewall rules blocking incoming traffic to the machine.
Iodine should be installed on the machine and SSH should be running.
Steps to Create a DNS tunnel using Iodine
Step-1: Buy a Domain from service of your choice (NameCheap, GoDaddy etc..)
Lets assume we bought a domain veer.org
Access the Domain configuration panel
Step-2: Configure appropriate DNS records for the domain as highlighted below.
The records might take some time to propogate depending on the DNS servers.
Step-3: Run Iodine Server.
Once the Server is Running on the machine it will create a DNS tunnel interface.
The DNS tunnel interface is assigned the specified IP 10.0.0.1.
This will be the IP we will interact with to send traffic to server machine inside the tunnel.
Step-4: Connect to Iodine Server From Iodine Client.
Now we will connect to the server from client machine to establish the tunnel.
We can Directly route all internet traffuc through the DNS tunnel as follows.
Step-4: Create Secure SOCKS5 proxy via DNS tunnel.
SSH is running on all interface on the Iodine server machine.
It should also be accessible on 10.0.0.1 which is IP of machine in DNS tunnel.
we are going to setup a Dynamic Proxy using SSH with following Command.
Step-5: Access Internet via the SOCKS5 proxy.
The SOCKS5 proxy is running on 127.0.0.1:8080 on client machine.
we can use it with programs such as proxychains also.
We can configure it in browser with programs such as FoxyProxy extension
Now you should be able to access internet via Encrypted SSH tunnel running inside the DNS tunnel.
How to Detect DNS Tunneling?
Attackers can choose to use custom written tools to do DNS tunneling
The tools might behave differently making it more difficult to detect.
The most common tools such as DNSCat and Iodine can be detected by looking for certain type of patterns in DNS traffic.
- Requests being made to non-human readable subdomains.
- Large cluster of DNS requests being sent continuously.
- IDS and IPS systems such as Suricata and Snort can also be configured to detect DNS tunneling.
© 2024 Vrikodar